[vc_row][vc_column][vc_custom_heading text=”Do you need to paint a DIY busy board? The short answer is – of course! Who would miss such fun?”][vc_column_text el_class=”ebqot” css=”.vc_custom_1598674779322{margin-bottom: 60px !important;}”]How to make a DIY busy board that will surely be a hit?
First, pick the right busy board parts for the tot’s age and skills. They should be challenging, but not frustrating.
Second, add color! From 6 months of age, educators recommend adding bright colors in baby surroundings. It helps little ones to develop vision from the initial black-and-white to other primary colors.
Paint your DIY busy board into bright colors and your toddler will love it. Not sure how? Check our tips and tricks below to nail it from the first time.[/vc_column_text][vc_column_text]The functionality of this developmental toy will stay there, whether you paint it or not, but the aesthetic side should not be left aside. Besides, a painted board is more eye-catching and gets babies’ attention at once.[/vc_column_text][/vc_column][vc_column css=”.vc_custom_1594186399576{margin-top: 60px !important;}”][vc_column_text]
You will need:
[/vc_column_text][/vc_column][vc_column width=”1/2″][vc_column_text]
- Painters tape
- X-acto knife
- Acrylic Paint
- Foam roller and a brush
[/vc_column_text][/vc_column][vc_column width=”1/2″][vc_column_text]
- Old newspapers
- A pencil
- Compass or some small bowls
[/vc_column_text][/vc_column][/vc_row][vc_row full_width=”stretch_row” css=”.vc_custom_1594183794669{margin-bottom: 42px !important;padding-top: 60px !important;padding-bottom: 60px !important;background-color: #edeff1 !important;}”][vc_column][vc_tta_accordion shape=”square” color=”white” c_icon=”chevron” active_section=”1″ no_fill=”true” collapsible_all=”true”][vc_tta_section title=”Step 1″ tab_id=”1594188211882-f2f2e6d6-139d”][vc_single_image image=”196″ img_size=”700×450″][vc_column_text el_class=”ebcap2″]Pick the color pattern to your liking. For me, the best combo is two main colors and one accent.[/vc_column_text][/vc_tta_section][vc_tta_section title=”Step 2″ tab_id=”1594188211921-3d94eb38-cf54″][vc_single_image image=”16174″ img_size=”700×450″][vc_column_text el_class=”ebcap2″]Apply the prime coat of white color for the brightest result. Without it, wood will absorb a lot of paint and your color will end up looking translucent.[/vc_column_text][/vc_tta_section][vc_tta_section title=”Step 3″ tab_id=”1594189533220-aa282f4d-71cd”][vc_single_image image=”16179″ img_size=”700×450″][vc_column_text el_class=”ebcap2″]Lay out your design with painters tape. Depending on the complexity of the pattern, you might need several rounds of Steps 3 – 7.[/vc_column_text][/vc_tta_section][vc_tta_section title=”Step 4″ tab_id=”1594189534374-f89725d0-4542″][vc_single_image image=”16178″ img_size=”700×450″][vc_column_text el_class=”ebcap2″]If you want to have some round accents like circles, waves or rainbows, you can make them with bowls. Trace the shape onto painters tape and cut out with the knife.
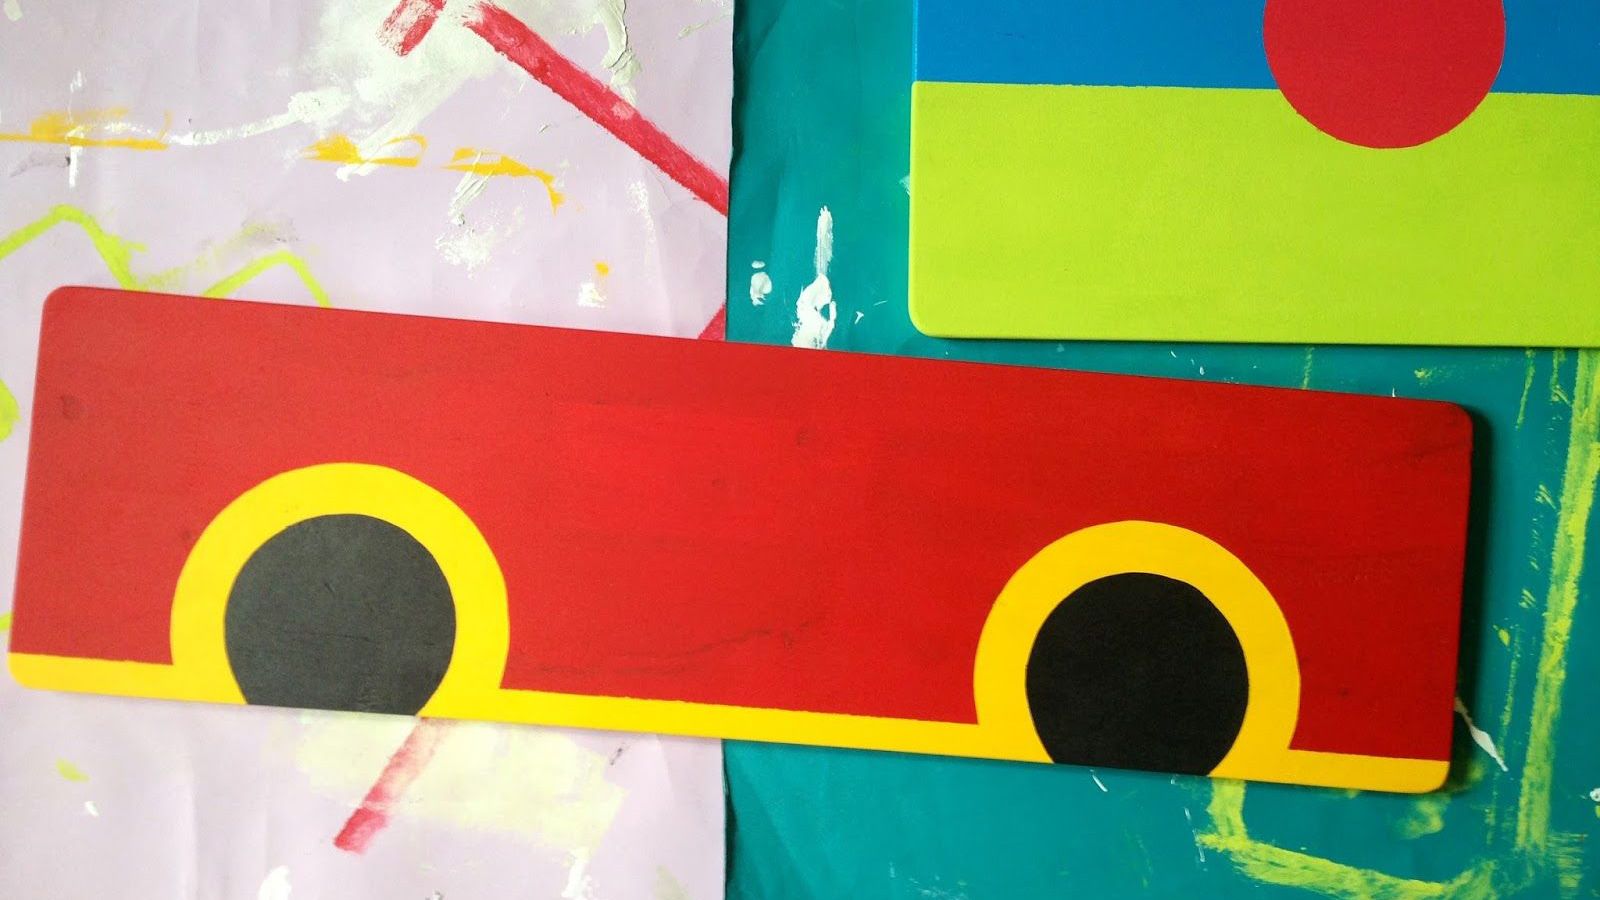
How to paint a busy board with shaped elements, like these clouds, for example? Make a stencil. You got it. Draw or print, trace on cardboard and cut out your desired pattern. Same goes for names or initials.[/vc_column_text][/vc_tta_section][vc_tta_section title=”Step 5″ tab_id=”1594189537167-968c204f-4c15″][vc_single_image image=”16179″ img_size=”700×450″][vc_column_text el_class=”ebcap2″]Leave the tape on the areas you DON’T want to be painted.[/vc_column_text][/vc_tta_section][vc_tta_section title=”Step 6″ tab_id=”1594189539163-9404c6f1-a712″][vc_single_image image=”16181″ img_size=”700×450″][vc_column_text el_class=”ebcap2″]Apply one or two coats of paint. Use different rollers for different colors. Let dry.[/vc_column_text][/vc_tta_section][vc_tta_section title=”Step 7″ tab_id=”1594189540143-fcc4a4cf-3c3a”][vc_single_image image=”16182″ img_size=”700×450″][vc_column_text el_class=”ebcap2″]Peel off the painters tape. Depending on the brand you used, you might face a little challenge here.[/vc_column_text][/vc_tta_section][vc_tta_section title=”Step 8″ tab_id=”1594189541048-a1e5ed22-548d”][vc_single_image image=”16183″ img_size=”700×450″][vc_column_text el_class=”ebcap2″]Using your brushes, fix the imperfections.[/vc_column_text][/vc_tta_section][vc_tta_section title=”Step 9″ tab_id=”1594189542041-56a0bb78-b31b”][vc_single_image image=”16184″ img_size=”700×450″][vc_column_text el_class=”ebcap2″]Add the accent color. If there’s just a touch of it, no need to hassle with paint and rollers – use brushes.[/vc_column_text][/vc_tta_section][vc_tta_section title=”Step 10″ tab_id=”1594189543038-09f13a57-7b5b”][vc_single_image image=”16185″ img_size=”700×450″][vc_column_text el_class=”ebcap2″]Let dry thoroughly before the assembly. Woot woot! Now you know how to paint a busy board.[/vc_column_text][/vc_tta_section][/vc_tta_accordion][/vc_column][/vc_row][vc_row css=”.vc_custom_1594192391720{margin-bottom: 120px !important;}”][vc_column][vc_column_text el_class=”ebqot” css=”.vc_custom_1594192691616{margin-top: 60px !important;}”]Drive inspiration from whatever comes to your mind. Cars, planes, ships, fire engines, names, favorite movies, books, anime (ノ◕ヮ◕)ノ*:・゚✧ or literally whatever.
Use anything your baby loves most, making a super bright positive spot in the playroom.[/vc_column_text][/vc_column][/vc_row]
Cool idea!!